At the Backwards Beekeeper meeting last week, Steve Rosales who lives in the same general area invited me to tag along to a cutout in Hermosa Beach with him and his brother-in-law, Carlo. Today was the day.
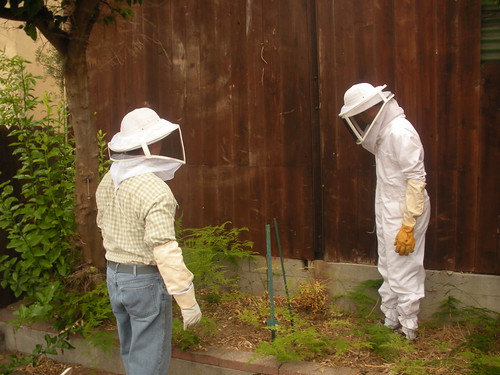
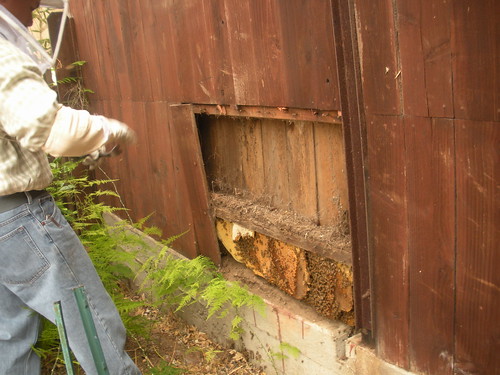
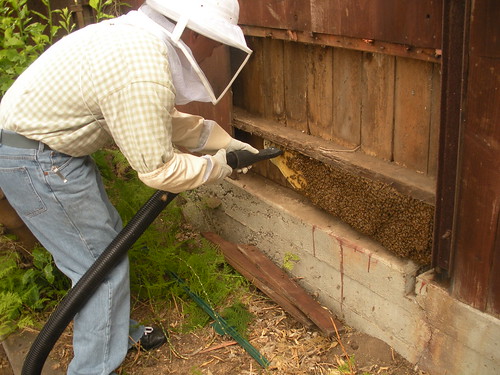
Carlo (left) & Steve (right) evaluate the situation, the bee's hive entrance is the little slot in the concrete base of the fence. All the properties in this area are on a hill and the neighbor's yard is 4 feet above this base. Some of the fence would have to be removed but we had no idea how far up or how wide it would go. The renter had not paid much attention to the fence until recently, the bees could have been there a very long time.

Carlo smoked them well before we started but this turned out to be a very calm hive. There were no aggressive signs the entire time of the cut out. We were there about 3 and half hours, working most of the time. (They were, I was documenting and learning).

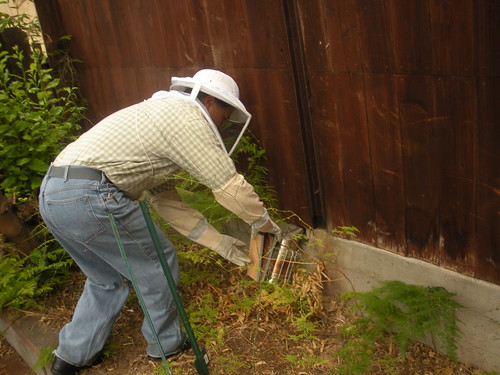
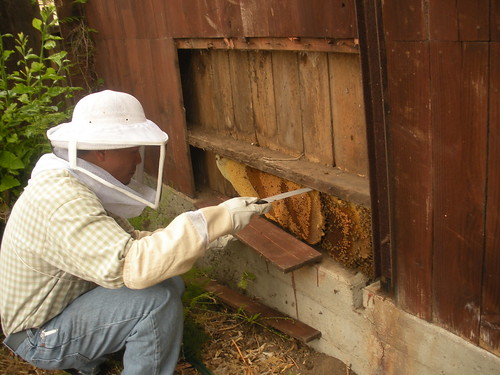
The bottom portion of the fence had short pieces which worked out for us. Steve started to remove the boards to gain access to the hive. The main hive's upward growth was blocked by a 2x4 about a foot from the bottom. We knew how tall it was but the next question was how wide?
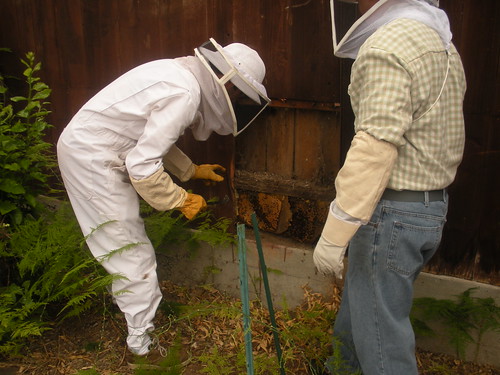
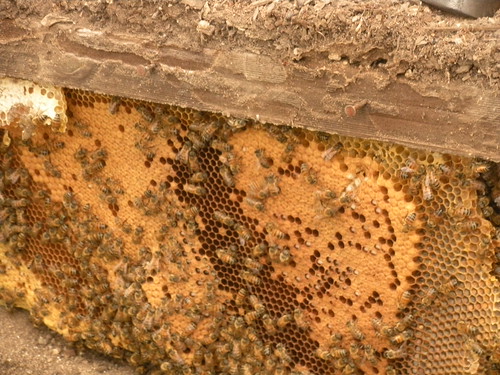
Carlo is about to remove the last section of board. I would estimate the hive to be about three feet across. The comb was layered with the thickest section to the right. That had four separate layers of comb. As the comb moved across it dropped from 4 to 3 to 2 to 1 at the far left.
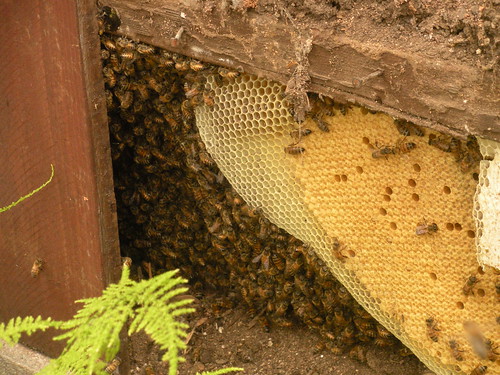
 This is the last section of comb. The bees would move to the open space when they were smoked but they quickly came back.
 When they came back they would beard right down the comb with the top row all looking upwards.
 Our hostess holding a piece of board with honey and drone cells. At first she was going to watch from an upstairs window but when I pulled out an extra veil she found some rubber gloves and go up close with us. At one point she was right in there using the vacuum.
Vacuum? Vacuum for bees?
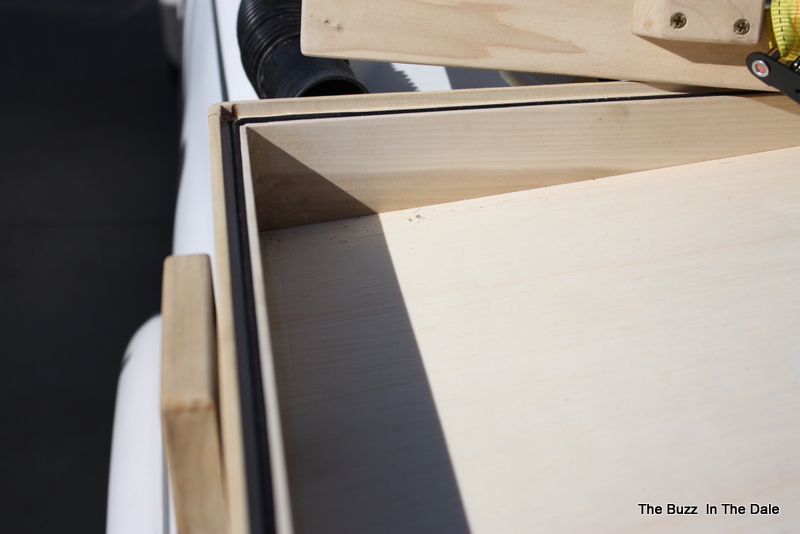
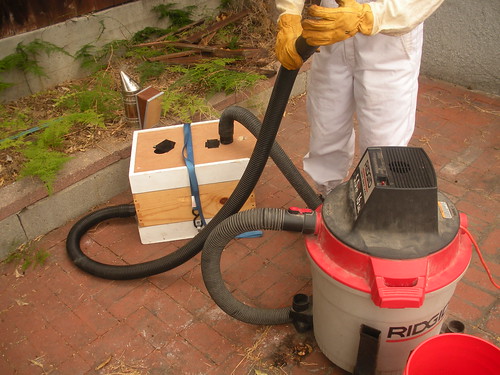
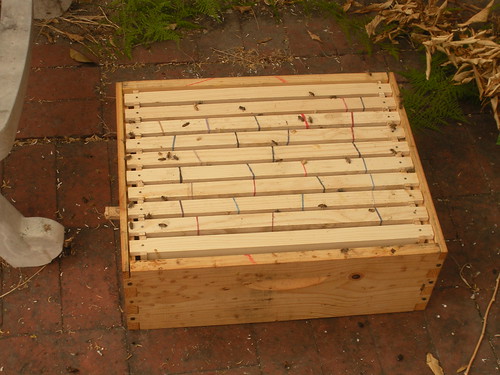
The heavy equipment put together by Steve from plans he found on the Internet. The shop vac is attached to an upper section with a screened bottom and hole for the hose plus another hole to adjust the suction. In the middle is a medium hive body with 10 waxed frames. The bottom section has a solid bottom with a hole in one end of the base for the vac hose. By adjusting the little panel on the top left of the upper piece you can keep the bees flowing in but not slamming them into the hive box. An initial test using an older vac did not have enough suction and the hard piece on the end of the hose was too narrow. We would be using the Improved Bee Vac.
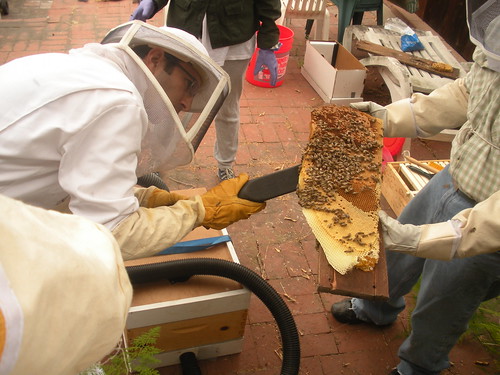
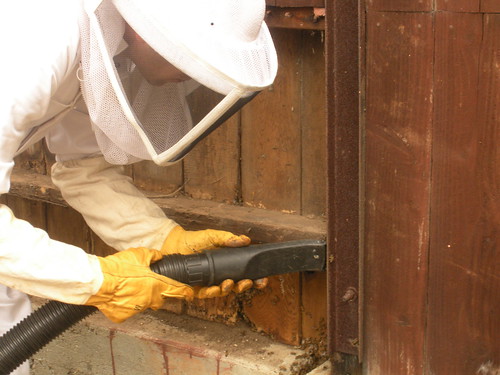
 Steve making the first run with the vac. Everyone got a shot at it including the lady of the house and myself. The suction is set to get them in slowly, not in massive quantities.
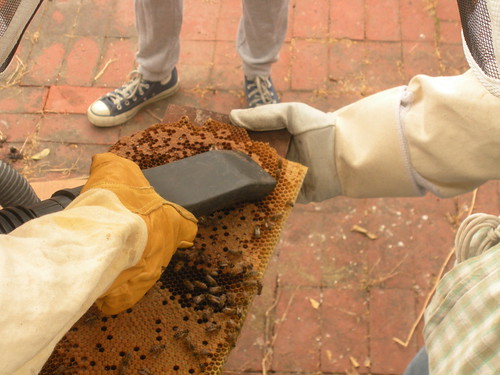
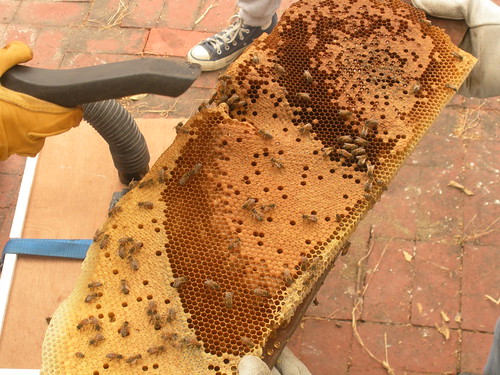
 Drone brood and honey ( it tasted very good too.)
Capped honey, the comb with the drone larvae had been attached to the light colored bit in the upper left.

Carlo gathering bees, this was very early in the process, it was not fast. We kept looking for the Queen. If we could spot her,Carlo would put her into a plastic box with holes in the lid, That would be placed into top section of the vacuum hive box to encourage the bees to stay there. I was able to put my bare finger right into the bees on the comb and they never reacted. This was a wonderfully calm hive.

The first layer of bees is in the vac box and Carlo begins the comb removal process. From this point on he was taking care of the comb and cutting it all down to fit into the frames on a second medium hive body.
 The clear comb above was full on bees on the other side so Steve gathers them up.

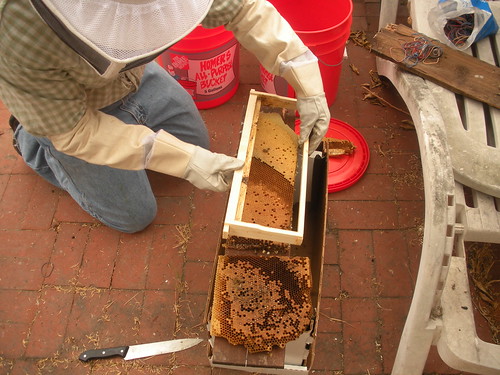
 Carlo fitting the comb into the frames and securing them with rubber bands.
This is much later with all of the comb removed. Steve kept patiently removing bees from cracks. He had not seen the queen was not sure she had been collected. Once Steve removed the two short pieces board just below his hands he spotted her. She had been going deeper and deeper into the hive as we got closer. Shortly after this I was able to make my main contribution to the cause. When Steve next saw the Queen she was moving away again and going behind the boards. Using a surge of energy I was able to reach over and flick on the vacuum just in time so Steve could extract the Queen unharmed using the Improved Bee Vac.
 Carlo gathered seven frames full of comb with honey, pollen and larvae.
 The medium hive with the comb is placed top of the hive with the bees. All are cinched together securely and later duct tape is wrapped around all the places where the boxes join.A great day and Carlo ended up with a hive of very nice gentle bees. Steve practiced doing another fence cut out and I learned a lot. Any time you can go along for something like this, jump on it. It was a great way to spend the morning at the beach.