Showing posts with label bee vac. Show all posts

Tuesday, September 13, 2011

Over The Hill

The Backwards Beekeepers Hotline had a couple calls from Palos Verdes that Randy checked out and discovered they were related.  Bob, an ex-sailor Pearl Harbor survivor, had a hive of bees under his eaves and the neighbors were nervous.  Ken who lives down the street decided he could safely house the bees if Randy assisted in obtaining a hive and every thing else. Done deal and once a date was selected we arrived.
This was a nice hive, fully exposed just under the eaves about 10 ft up.

It was a good looking hive, just getting active when we started.
Once the Mighty Bee Vac was hooked up Randy was up the ladder and collecting bees.

As always, Randy is the point man on the ladder.  I am the ground guy.

Bees started to show up in the collection super immediately.


As the Bee Vac does its job the comb comes into view.

And there are a lot more bees in the super.

Ted from across the street came over to take the picture (thanks, Ted, he gave me 300 of them on a disc,)  We like to involve every one so Ted got his shot at collecting bees.

Most of the bees on the outside are gone and Randy started to cut out the comb.

There was a lot of drone comb which I left if the piece fit the frame nicely.

This was one of several queen cells we found.  The brood we found looked okay to us  but the hive may have planned to replace the queen for some reason.  We don't know, only the bugs know.

A nice frame of brood.  Once the small outer comb was removed Randy used an empty frame to measure and cut out proper sized pieces of comb.  That made putting it into the frames very easy.
Bob, the home owner had a very nice front row seat all morning long.
Another queen cell

More good looking brood

The standard hive body is full of comb

And Randy is still bring down more comb.

We were lucky to have a nuc with some medium frames for the remainder of the comb.

The comb is all clear but when Randy checked the vent holes one did not have screen, there were more bees inside. Later he fashioned a bee escape and put it in place.  The returning bees should hang around on the outside overnight and Randy will return early tomorrow with his bee vac to collect them.  He will also set up a trap out near by.

I thought we had most of the bees in the Bee Vac.  Where are these coming from?

Bob was interested in everything, as long as it stayed outside and moved on later.

The Bee Vac collection hive is very full.
After vacuuming many many bees off that kept gathering on the nuc and full super I realized these were mainly robber bees looking for free honey.  Standing back on the sidewalk you could see them coming straight down to the area.  Once we moved the nuc and other pieces away from the area the bees left.  We took the bees and supers down the street and Randy installed them in their new home.  With all that brood they should stay there.  I have no idea what was going to happen to the thousand or so robber bees that got sucked up through the Bee Vac in to the collection hive.  Sometimes bees make bad decisions.  When we finally got done Randy headed off to collect a swarm and Norwalk and I drove home for a nap.  It was a long but good day.  One man got rid of bees he did not want another got a new hive.  It was a very good day in our bee world.  Thanks to Randy for doing the hard and high parts and to Ted for all the photos. 


Monday, March 21, 2011

A Couple Notes

The Backwards Beekeepers meeting was yesterday where I planned to demo the Solar Wax Melter but the weather did not cooperate at all.  I had guessed this would happen so I processed  some of the Pierce Hive Capture comb earlier in the week.


This was after 3-4 hours of sunlight.  I left it for a couple more days and it reduced more.
This was old comb and very dark, it does not produce much wax and you end up with all the dark stuff on the paper filter.  That is slumgum.  It does not look good and you could throw it way.  Don't do that unless you have a lot of it.  The slumgum and the underlying paper make excellent swarm lure.  Just tear off a piece and put it in a hive that is empty.  You might get a swarm with out any work or using a Bee Vac.

Speaking of the Bee Vac, Rob of Bushkill Farms was the originator of the first Bee Vac I saw and his plans were the inspiration for the one made for me.  Rob is now selling his Bee Vac and has a website where you can order one.  If your woodworking skills are limited and you need a Bee Vac, this is a fine option for you.  Do check out the discussion of the Bee Vac on his regular site.  There are a number of observations that might be helpful if you want to make your own.

On the lighter side, check out Max Wong's blog, My Roman Apartment and her adventure playing a beekeeper in a Kashi commercial.  It has not been aired yet.  Watch for  it.

Thursday, January 13, 2011

The Bee Vac As Art


Basically a Bee Vac is a couple boxy pieces that fit over and under a super or nuc used to collect bees using a shop vac.  I have seen Steve Rosales use his a couple of times.  He made his according to plans and ideas from Robo's World BushKill Bee Blog.  I decided I could use one but wood working is not one of my skills.   Fortunately I was able to trade some cooking skills with my good friend Steve Shultz (the guy in the picture.) for a bee vac.  I had scanned over Robo's page and seen Steve Rosales' bee vac in action so I had an idea of what I wanted.  The only real change I suggested was side rails to keep the super from shifting when in transit.
Any time you make a simple suggestion to an engineer expect more than simplicity back.  
Steve is an engineer with imagination and loves a challenge.  He delivered, big time. He read through all the notes from other bee vac makers and incorporated some of their ideas and a few of his own.


The basic two piece unit with a slopped floor raising from the intake hole on the bottom piece.
Both pieces have dove-tail joints on the corners
Intake hole cover is held in place with magnets and easy to open or close, even with bee gloves on.

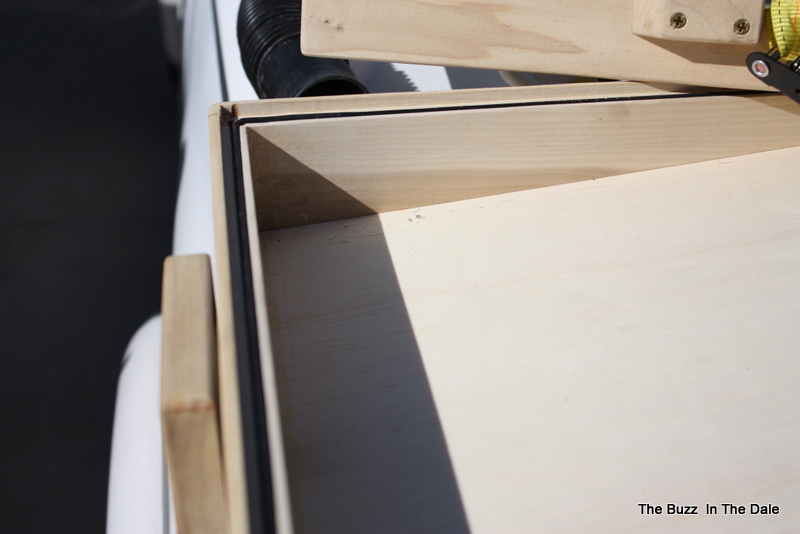
Rubber gaskets are around all sides on both pieces.  The super sits inside on top of the gaskets of the bottom and the same for the top piece.. A little extra space within the top and bottom allow supers that are not quite square to still sit on the lip tightly.

Custom made brackets for a ratchet strap that is tied other side of the top piece.  When tightened the top and bottom pieces will fit tightly and there will be no spaces for bees to leak out during transit.

Top piece with a screen bottom below the outflow hole for the vacuum.
Top piece cover, air flow controller.  There are magnets on the four corners to hold it in place and magnets in the top frame piece
Air flow controller in place and partially open

Underside of the bottom showing the slanted floor and rubber feet
Bee Vac with a spacer between the two pieces for storage without a super between them
 
Bee Vac closed and secure for moving.
The craftsman and the Bee Vac. The outside wood is all sealed, interior is raw wood with no sealer  or paints.
Thank you Steve for a job very well done and Robo who made the earlier version and also Steve Rosales for showing me how to use a Bee Vac.  All just in time for the Spring Flow, who could ask for more?

(The Bee Vac will show up at the meeting on Jan. 16.)