A week ago I was wandering through an estate sale that had been well picked over. I had no great expectations but I noticed a box under table sitting in a puddle. This is what I found for $5.

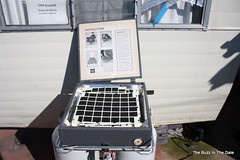
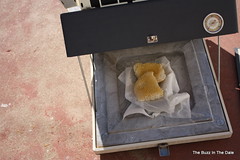
This is a late 50's early 60's solar oven in a suit case thing.
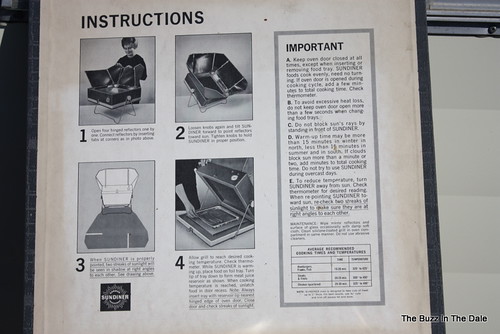
This is how we dated it, look at the hair-do. That matches people I knew in 1963.

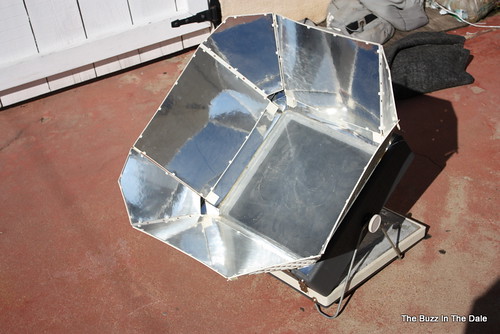
Opened and folded out.
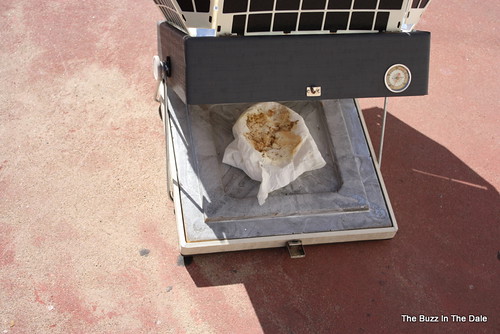
This is the cooking chamber including a thermometer. Once set up and closed it heated to over 250 very quickly. That is some wax comb that had been sitting in my feeble attempt at solar melting unit for 4 months. It was done very quickly

This was the result, not much but a decent start so I pulled out some old comb I had saved.

I was about ready to heat this when I paid more attention to the detritus trail across the wax.

I looked closer.... try it.

And I spotted this unwelcome guest. It had been in a plastic container for several months.
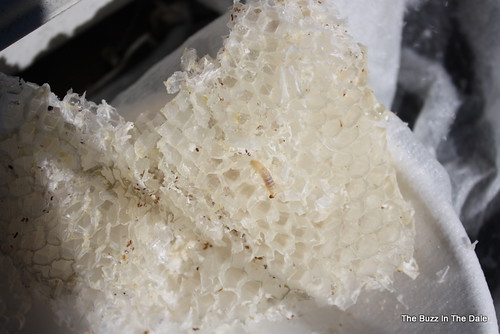
I changed the colors so it would show up better in the big picture. Normally it looks like this, just a bit a gray for the gut and a dark head. It is not readily obvious against white comb. I had not idea what size they were, I expected something like a large maggot. These are much smaller and harder to spot. It was dismissed as soon as I took the pictures. I had some used frames in a bag and quickly trimmed most of the old comb off the starter strips and all of them went into the freezer for over 2 days. That is supposed to kill any larvae I hope I have gotten rid of them now..
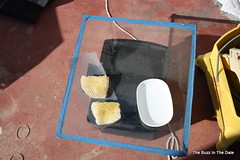
I had a bit more comb sitting on my faux solar oven which I put into the oven. This is a good idea that needs a lot of work. It does heat quickly and melts the wax but the cooking chamber is too shallow and as I tilted the top towards the sun, the water under the wax ran out and the wax melted all over the oven. I will have to work on it and design a bigger cooking chamber, this one barely contained a normal thickness of comb. I will get it working by the time I have honey and comb to melt... soon I hope. The idea is good but the execution is weak at this time.
I did not have any more comb but I did have a couple beeswax candles. My mother had them from Y2K scares when she was convinced all technology was going to crash. They may be tainted with chemicals, I have no way to know. I just hope it was blessed by some monk somewhere and okay for the bees. Since I am just using it for starter strips it should be okay.
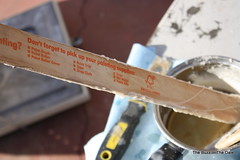
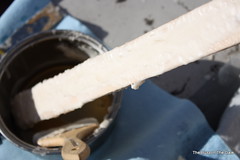
The way to make starter strips is to get a large paint stir stick, not the normal size, this is bigger.
Soak it in water for a while, then paint melted wax up and down one side until you have a nice layer of wax. Do not wait for it to dry, once you think it has set, use a putty knife and lift the wax layer off.
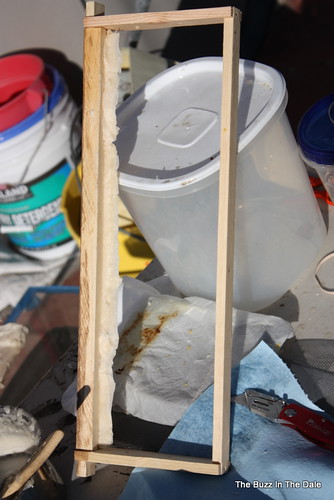
You can cut it half if it is very thick or fold it over and make a strip thick enough and insert it into the slot on the top of your frame. Brush a little bit of warm wax along the new strip and it will set up and stay in. Now you have a 1005 starter strip the bees should love.
A word of advice, do all of the wax work away from the kitchen. It is too easy to spill the wax or spatter it where you do not want it. Believe, I have been there.
When making the strips do not wait too long to lift them off the board. Too long and they tend to break and cannot be cut to size. Thanks to Kirkobeeo for advice on making the strips. If you do not want to make wax strips, just paint warm wax on paint stirrers or strips of cardboard and use those
Next up, the big hive inspection. The bees have been very busy lately and may need more room. The weather is finally going to cooperate tomorrow . See you then.
This is a late 50's early 60's solar oven in a suit case thing.
This is how we dated it, look at the hair-do. That matches people I knew in 1963.
Opened and folded out.
This is the cooking chamber including a thermometer. Once set up and closed it heated to over 250 very quickly. That is some wax comb that had been sitting in my feeble attempt at solar melting unit for 4 months. It was done very quickly
This was the result, not much but a decent start so I pulled out some old comb I had saved.
I was about ready to heat this when I paid more attention to the detritus trail across the wax.
I looked closer.... try it.
And I spotted this unwelcome guest. It had been in a plastic container for several months.
I changed the colors so it would show up better in the big picture. Normally it looks like this, just a bit a gray for the gut and a dark head. It is not readily obvious against white comb. I had not idea what size they were, I expected something like a large maggot. These are much smaller and harder to spot. It was dismissed as soon as I took the pictures. I had some used frames in a bag and quickly trimmed most of the old comb off the starter strips and all of them went into the freezer for over 2 days. That is supposed to kill any larvae I hope I have gotten rid of them now..
I had a bit more comb sitting on my faux solar oven which I put into the oven. This is a good idea that needs a lot of work. It does heat quickly and melts the wax but the cooking chamber is too shallow and as I tilted the top towards the sun, the water under the wax ran out and the wax melted all over the oven. I will have to work on it and design a bigger cooking chamber, this one barely contained a normal thickness of comb. I will get it working by the time I have honey and comb to melt... soon I hope. The idea is good but the execution is weak at this time.
I did not have any more comb but I did have a couple beeswax candles. My mother had them from Y2K scares when she was convinced all technology was going to crash. They may be tainted with chemicals, I have no way to know. I just hope it was blessed by some monk somewhere and okay for the bees. Since I am just using it for starter strips it should be okay.
The way to make starter strips is to get a large paint stir stick, not the normal size, this is bigger.
Soak it in water for a while, then paint melted wax up and down one side until you have a nice layer of wax. Do not wait for it to dry, once you think it has set, use a putty knife and lift the wax layer off.
You can cut it half if it is very thick or fold it over and make a strip thick enough and insert it into the slot on the top of your frame. Brush a little bit of warm wax along the new strip and it will set up and stay in. Now you have a 1005 starter strip the bees should love.
A word of advice, do all of the wax work away from the kitchen. It is too easy to spill the wax or spatter it where you do not want it. Believe, I have been there.
When making the strips do not wait too long to lift them off the board. Too long and they tend to break and cannot be cut to size. Thanks to Kirkobeeo for advice on making the strips. If you do not want to make wax strips, just paint warm wax on paint stirrers or strips of cardboard and use those
Next up, the big hive inspection. The bees have been very busy lately and may need more room. The weather is finally going to cooperate tomorrow . See you then.
No comments:
Post a Comment